Posts Tagged ‘SQL Server’
SQL Server Partition Management Utility: Part 2
In Part 1 of this series of the free SQL Server Partition Management Utility we covered why and how to use the utility, and walked through a simple example where we executed the utility from the command line. In this post I want to show you how to execute the utility from SSIS.
Utilizing in SSIS
Let’s go through the same example as before where we want to load a new partition to the partition range to the SalesOrderHeader table. You probably now have a good idea how the SSIS package design needs to flow:
- Create staging table with no indexes
- Load newly created staging table
- Add indexes and constraints to staging table to match destination table partition
- Call the SWITCH command to move staging table to a new partition in the destination table
 And below is a screenshot of the corresponding package in SSIS (I’m firmly in the not a fan group of the VS2012 color theme or lack thereof I suppose you could argue!).
The Execute Process Tasks with the task naming convention prefix “EPT” will handle calling the utility’s executable.

Figure 1: Control flow view of package
 However, I am a huge fan of project parameters in SSIS 2012, so let’s create a few to make our lives easier. For clarity, I’ve prefixed all the parameters with “partmgmt”. The first five parameters contain the values for the five different commands that the executable handles. I specifically stored them in parameters because I kept forgetting what they were and had to keep jumping back and forth between the solution and the documentation. The final parameter partmgmt_Executable stores the file path of the ManagePartition executable.

Figure 2: Project parameters
One last configuration step, the creation of variables to store the arguments to pass to the ManagePartition executable. We’ll need to pass the database, schema, and table names of the destination partitioned table. Also, we’ll need the name of the staging table, and the partition range value which will be used to create the staging table on the correct filegroup and to create the check constraint.
Homework: You’ll need to figure out the most appropriate way to set the partmgmt_PartitionRangeValue variable for your solution.

Figure 3: Variables
In order to call the ManagePartition executable from SSIS, we’ll use the Execute Process Task. On the Expressions page I’ve created two expressions, one for the executable to be called and one for the arguments to be passed to the executable (shown in Figure 4). The Executable expression simply uses the partmgmt_Executable project parameter. Figure 5 shows the expression used for the arguments which relies purely on the project parameters and variables that we’ve already defined.
Short recap of the arguments:
- /C switch is the command to be executed
- /d switch is the database name of the partitioned table
- /s switch is the schema of the partitioned table
- /t switch is the table name of the partitioned table
- /A switch is the name of the staging table
- /v switch is the value of the partition range to be loaded into the partitioned table

Figure 4: Expressions for Execute Process Task

Figure 5: Full detail of Arguments expression for CreateStagingNoIndex
Now that we’ve created staging table Test1 for the partition range value of 07/31/2009, the next step would be to load the staging table with a data flow task. I’ll assume you already understand how that works so I’ll just show you the source query used in the data flow task to load our dummy record which uses the DATEADD function to add a year to the OrderDate, DueDate, and ShipDate for one record in the SalesOrderHeader table that has the highest OrderDate.

Now we are ready to add the necessary objects to the staging table so that it meets the requirements of the SWITCH operator. Because we spent the time to properly configure our project parameters and variables, we can use the previous Execute Process Task as a template and just modify the Arguments expression to use a different project parameter (partmgmt_Command_IndexStaging) for the /C or command switch.

Figure 6: Full Detail of Arguments expression for IndexStaging
We are now ready for the final step of the process, switching the staging table into the destination partitioned table. The syntax for the T-SQL statement is:
ALTER TABLE <StagingTableName> SWITCH TO <DestinationPartitionedTable> PARTITION <PartitionNbr>
We already have variables for <StagingTableName> and <DestinationPartitionedTable>, but are missing <PartitionNbr>. Let’s add a new Execute SQL Task to the beginning of our package that queries the $PARTITION system function and supplies the partition range as a parameter to return the partition number like so:

Figure 7: SQL Statement to get partition number
Add our partition range value parameter like so:

Figure 8: Pass in partition range value variable to parameter
Store the result of the query to our partition number variable like so:

Figure 9: Set result of query to partition number variable
Ok, now we have all the elements we need to construct our ALTER TABLE SWITCH statement! This time I decided to use an expression on a variable to construct the SQL statement that is executed by the Execute SQL task named “SQL SWITCH Partition”. Here is a look at the expression:

Recap
Now you have a pattern that you can use to incorporate the SQL Server Partition Management Utility into your SSIS ETL processes. Have fun designing!
SQL Server Partition Management Utility: Part 1

In all of the SQL Server environments I’ve worked in over the last 8 years since SQL Server 2005 was released I’ve seen first hand that table partitioning isn’t used frequently enough. Now, don’t get me wrong I think most SQL Server professionals are very aware of the feature and its benefits. However, I believe database developers are actually paralyzed by everything they need to consider to design an effective solution utilizing partitioning.
One of the benefits of table partitioning is that it allows you insert data into a very large table as fast as possible. This is accomplished by first loading data into a staging table that has the same structure as the destination table. Assuming a list of requirements on the staging table is met, you can then use ALTER TABLE with the SWITCH option to move the data in the staging table into a partition in the destination table. The switch happens in the blink of an eye as it is a metadata only operation.
So database developers need to know what requirements must be met on the staging table before figuring out how to automate loading data into a partition table using the SWITCH pattern.
- The staging table must have the same column structure as the partitioned table
- The staging table must have the same indexes
- The staging table must have the same constraints
- The staging table must have the same filegroup as the target partition of the partitioned table
- The staging table must have a check constraint to ensure the data fits into the target partition of the partitioned table
Meeting these requirements isn’t the hardest thing to accomplish, but it isn’t all that trivial either, especially if have an environment where table structures are changing due to new development or index tuning. One approach to handle this is to store the DDL for each partitioned tables’ table structure, indexes, and constraints and utilize them in your ETL packages. With this approach, for every DDL change that you are aware of you have to change your ETL to accommodate the change. And for changes that you don’t know about (how could that ever happen)? Well, you’ll find out soon enough from a failed ETL run.
But don’t worry, as the subject of this blog post suggests there is a free utility to help you with the dirty work!
The Utility

The SQL Server Partition Management project on CodePlex is that utility. It provides several commands that allow you to control the automation process to create the staging table while ensuring that it meets all of the requirements of the SWITCH operator that we previously outlined. The utility determines the database structures that need to be built based on the arguments passed to the utility.
On the Downloads page of the CodePlex project the ManagePartition.exe is the executable that does all the work. It is executed from either the command line or through SSIS. In part two of this series I’ll cover in detail how to use this utility in SSIS.
The ReadMe.htm file is also available on the download tab and contains very good documentation for the executable (confusingly the CodePlex documentation tab is empty).
The third and final download available is named PartitionManagement3.0.zip. This contains all of the source code should you choose to extend the solution as you see fit as well as SQL test scripts.
Pre-reqs
Make sure that you have the required pre-requisites called out in the readme file with download links. You will need the .NET Framework 3.5 or higher, SQL Server 2012 System CLR Types, AND SQL Server 2012 Management Objects (SMO).
Commands
The ManagePartition executable accepts five different commands that assist you with creating your staging table to meet the requirements for the SWITCH operator. The two commands that I typically use, and will focus on for the rest of this post are CreateStagingNoIndex and IndexStaging. CreateStagingNoIndex pretty much does what it sounds like, it creates a staging table with the same structure as the specified destination table without any indexes (clustered or nonclustered) so that you can load the staging table as fast as possible. You can probably also guess what the IndexStaging command does, it creates any indexes or indexed views, and the check constraints for the partition number or range value specified. The three other commands available are outlined below:
- ClearPartition– Switches out a partition in a partitioned table to a staging table.
- CreateStagingFull– Creates a staging table that matches a partition of a partitioned table in terms of structure, indexes, constraints, and filegroup.
- CreateStagingClusteredIndex– Creates a staging table that matches a partition of a partitioned table in terms of structure, the clustered index, and filegroup. Nonclustered indexes will not be created.
Arguments
I’m not going to cover all of the arguments available but the table below outlines the more important arguments. However, be aware that there is also functionality to connect without using integrated security by providing a SQL Server login and password and to script the objects to be created without executing them on the server.
| Argument | Short Form | Description |
| /Command | /C | The utility command to be executed |
| /Database | /d | The name of the database |
| /Schema | /s | The schema name of the partitioned table |
| /PartitionTable | /t | The name of the partitioned table |
| /PartitionNumber | /p | The number of the target partition in the partitioned table |
| /PartitionRangeValue | /v | The range value corresponding to the target partition in the partitioned table |
| /StagingTable | /A | The name of the staging table to be created |
Testing
The provided testing script PartitionMgmtTest_2012.sql in the PartitionManagement3.0.zip creates a database named PartitionTest by copying some objects and data from the AdventureWorks2012 database. Note, that the script does attempt to drop views before they exist so don’t be surprised when you see errors when running the script. Also, the entire script isn’t meant to be executed in one batch. Do a CTRL+F and search for the string ‘ManagePartition tests’. Execute everything above this line first to create the database. Everything below the line is the test cases.
Hands On with the Utility
Why should I use it, check. Background info, check. Let’s see it in action!
Our scenario is that we want to load the partition corresponding to the partition range value of 01/01/2007 for the SalesOrderHeader table. This table has a primary key, foreign keys, indexes, check constraints, and default constraints that are staging table must exactly match before using the SWITCH operator.
The first thing we’ll do is run the ManagePartition executable with the command CreateStagingNoIndex with the appropriate arguments as shown below to create our staging table named Test1.
![]()
The command executes in just a few seconds and we no have a staging table with no indexes or constraints that we can bulk insert data into very fast. We’ll pretend we accomplished that task and are now ready to make sure the table meets all the requirements of the SWITCH operator. We’ll do that by using the IndexStaging command as shown below:
![]()
Notice the only difference between the two commands we just executed was the /C argument which specifies the command to be run, everything else stays the same…pretty simple! So how do we verify that it worked as advertised? Let’s first browse the two tables in SSMS object explorer and eyeball the keys, constraints, and indexes.

BOOM! Exact match, even the Columnstore index! What is the extra constraint chk_Test1_partition_4 on our staging table you ask? No worries, this is check constraint to meet our last requirement that enforces the data in our table to match the partition range for our specified partition range value. And the definition of the check constraint:

One last test, lets make sure we can successfully execute the SWITCH operator. Since we cheated before and never actually loaded any data into the staging table and the fact that our partitioned table already has data for the partition range specified what we’ll do instead is first SWITCH the partition out of the partitioned table and into the staging table and the SWITCH the partition back into the partitioned table from the staging table.
First, the screenshot below shows the SWITCH out of the partitioned table and into the staging table. Also, notice that querying the staging table now returns data!

And finally, we SWITCH the staging table into the partitioned table. Querying the staging table now returns no data as expected.

Recap
Now that I showed you how you can use the SQL Server Partition Management Utility to ease the pain of creating staging tables that will meet the requirements of the SWITCH operator you are running out of excuses for implementing partitioning in your environment…try it out!
In part 2 of this series I’ll show you how to use the utility within SSIS, stay tuned ![]()
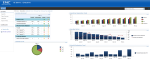
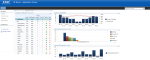
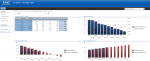
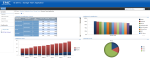
Latest Project Screenshots
Here are some screenshots of a Business Intelligence for Infrastructure solution which provides a holistic view of a clients’ infrastructure, KPI based indicators, and interactive web parts for further analysis. The solution is built upon the latest Microsoft Business Intelligence product offerings including SharePoint 2010, PerformancePoint 2010, and SQL Server 2008 R2.